
Introduction: Why Homemade Truffles Are the Perfect Treat
Homemade truffles are the perfect treat for anyone who loves chocolate. These bite-sized delights combine rich, velvety ganache with a delicate outer coating, making them an irresistible indulgence. Whether you’re preparing them for a special occasion, gifting them to a loved one, or simply satisfying a sweet craving, truffles are surprisingly easy to make at home.
Unlike store-bought chocolates, homemade truffles allow you to control the quality of ingredients and customize flavors to your liking. From classic dark chocolate to exotic infusions like espresso or orange zest, the possibilities are endless. Plus, making truffles at home is a fun and rewarding experience—you get to play with chocolate while creating a gourmet dessert!
In this guide, we’ll explore everything you need to know about homemade truffles, from selecting the best ingredients to mastering the perfect ganache. You’ll also learn to troubleshoot common issues and get creative with different coatings and fillings. By the end, you’ll be confident to make your own luxurious chocolate truffles that rival those from a high-end chocolatier.
Essential Ingredients for Perfect Chocolate Truffles
Great truffles start with high-quality ingredients. Each component plays a crucial role in achieving the right texture, flavor, and overall indulgence. Let’s break down the essentials.
Choosing the Right Chocolate: Dark, Milk, or White?
The type of chocolate you use will determine your truffles’ overall flavor and texture. Here’s how each type affects the final product:
- Dark Chocolate (70% or higher cocoa content): Offers a deep, intense chocolate flavor with a slightly bitter edge. It’s perfect for rich, sophisticated truffles.
- Milk Chocolate (30–50% cocoa content): Creamier and sweeter than dark chocolate, milk chocolate truffles are smooth and mellow, making them a favorite for those who prefer a milder taste.
- White Chocolate: Since it lacks cocoa solids, white chocolate truffles are buttery and sweet with a hint of vanilla. They pair well with fruit flavors and spices.
For the best results, always choose high-quality chocolate bars instead of chocolate chips, as chips contain stabilizers that can affect texture.
The Importance of Heavy Cream and Butter for Smooth Texture
Truffles get their signature melt-in-your-mouth consistency from a ganache made of chocolate and cream. Heavy cream is essential because it adds moisture and creates the silky-smooth texture that makes truffles so decadent.
Butter enhances the richness of the ganache and helps it solidify to the perfect consistency. A small amount of butter also adds a slight sheen, making your truffles look as luxurious as they taste.
Flavor Enhancements: Liquors, Extracts, and Spices
While classic truffles are delicious, adding extra flavors can take them to the next level. Here are some ideas:
- Liquors: A splash of rum, brandy, or Grand Marnier can add warmth and complexity.
- Extracts: Vanilla, almond, or peppermint extract can enhance the natural flavors of the chocolate.
- Spices & Zests: Cinnamon, chili powder, espresso powder, or orange zest can add depth and a unique twist.
Experiment with different combinations to create your signature truffle recipe!
Step-by-Step Recipe: How to Make Homemade Chocolate Truffles
Making homemade truffles is easier than you might think! With just a few high-quality ingredients and simple steps, you can create rich, creamy chocolate treats that melt in your mouth. Follow this step-by-step guide to master the perfect truffle.
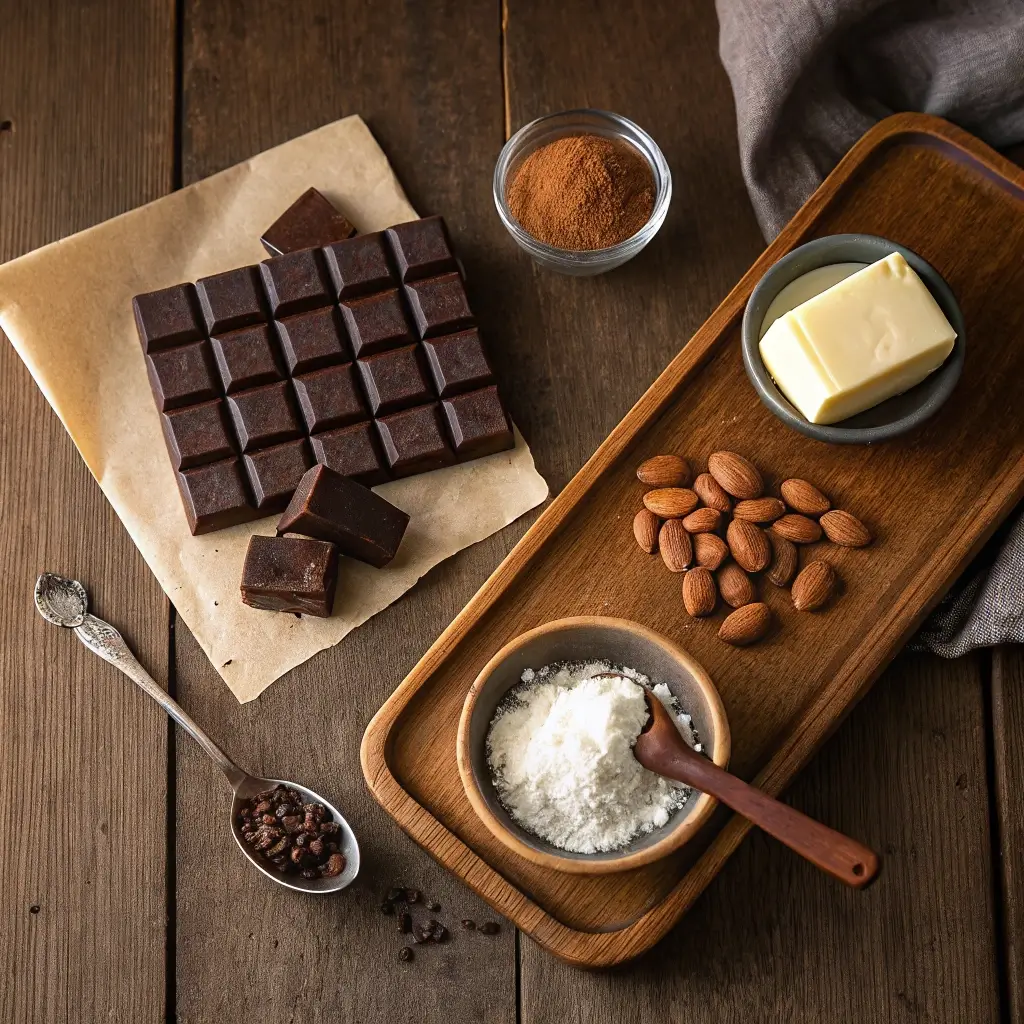
Homemade Chocolate Truffle Ingredients: What You’ll Need
Before you begin, gather all your ingredients. Using good-quality chocolate and fresh dairy will make all the difference in taste and texture.
| Ingredient | Quantity | Purpose |
|---|---|---|
| Dark Chocolate (70% cocoa or higher) | 8 oz (225g) | Base for the ganache |
| Heavy Cream | ½ cup (120ml) | Creates a smooth and creamy texture |
| Unsalted Butter | 2 tbsp (30g) | Adds richness and enhances flavor |
| Vanilla Extract | 1 tsp | Enhances the chocolate’s depth |
| Cocoa Powder | ½ cup | Classic coating for truffles |
| Optional Flavoring (Liquor, Espresso Powder, or Orange Zest) | 1 tbsp | Adds a custom flavor twist |
| Chopped Nuts, Sprinkles, or Shredded Coconut | ½ cup (optional) | Additional coating choices |
Step 1: Melting Chocolate for Homemade Truffles and Making Ganache
Ganache is the foundation of any great truffle. It’s made by combining melted chocolate and heavy cream to form a rich, velvety mixture.
- Chop the chocolate into small, even pieces to ensure it melts smoothly. Place it in a heatproof bowl.
- Heat the heavy cream in a small saucepan over medium heat. Bring it just to a simmer—don’t let it boil!
- Pour the hot cream over the chocolate and let it sit undisturbed for about 2 minutes. This helps the chocolate soften before mixing.
- Stir gently with a spatula until the mixture is smooth and glossy. If needed, place the bowl over a pan of simmering water (double boiler method) to help melt any remaining bits.
- Add the butter and vanilla extract, stirring until fully incorporated. If using liquor or another flavoring, mix it in at this stage.
At this point, your ganache should be silky and well combined. Now, it’s time to chill it!
Step 2: Chilling Homemade Chocolate Truffles for the Right Texture
For truffles to hold their shape, the ganache must be properly chilled.
- Cover the bowl with plastic wrap and place it in the refrigerator.
- Let the ganache chill for at least 2 hours, or until it firms up. It should be scoopable but not rock-hard.
- If you’re in a rush, place the ganache in the freezer for 30–45 minutes, but be sure to check frequently to avoid over-hardening.
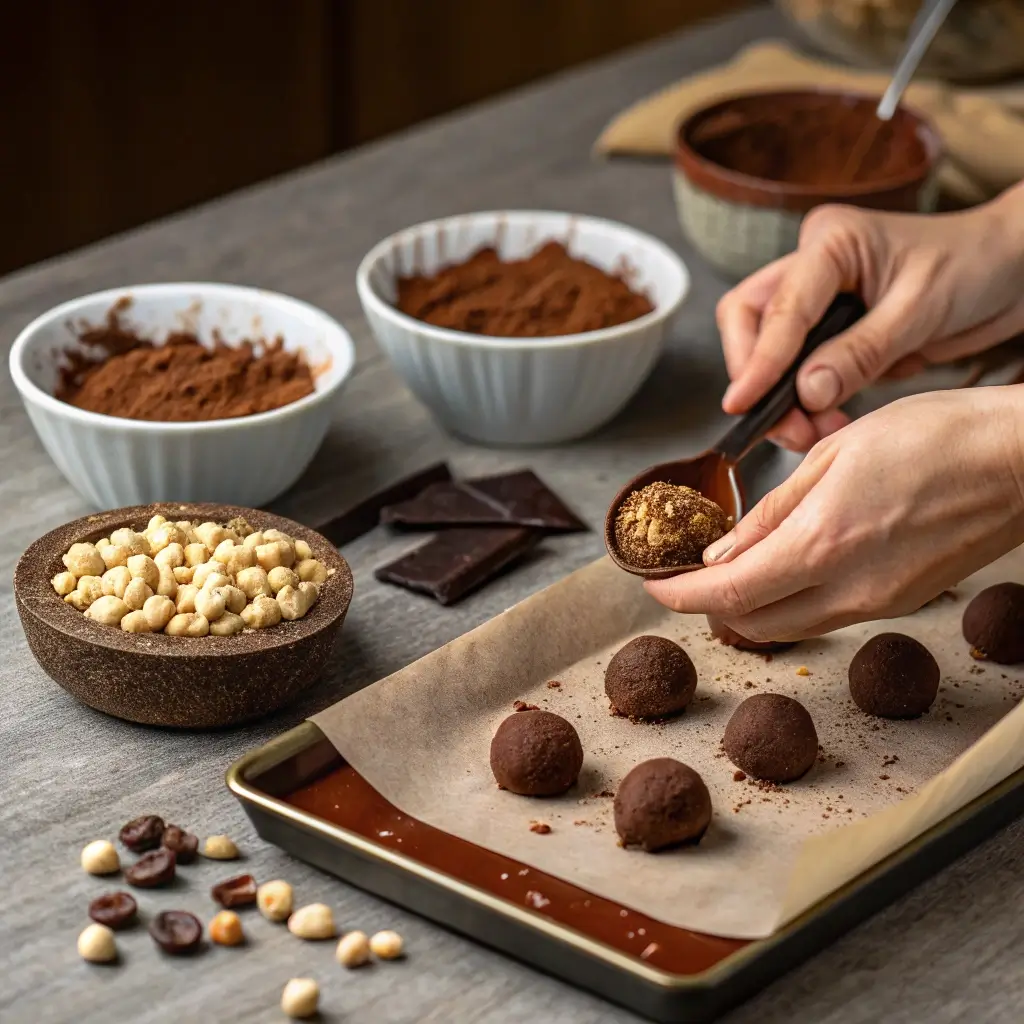
Step 3: haping and Rolling Homemade Chocolate Truffles Like a Pro
Now comes the fun part—rolling the truffles!
- Use a melon baller, small spoon, or your hands to scoop out portions of the chilled ganache.
- Roll each portion between your palms to form smooth, bite-sized balls. If the ganache is too sticky, dust your hands with cocoa powder.
- Place the rolled truffles on a parchment-lined baking sheet and chill them for another 15–20 minutes to help them set before coating.
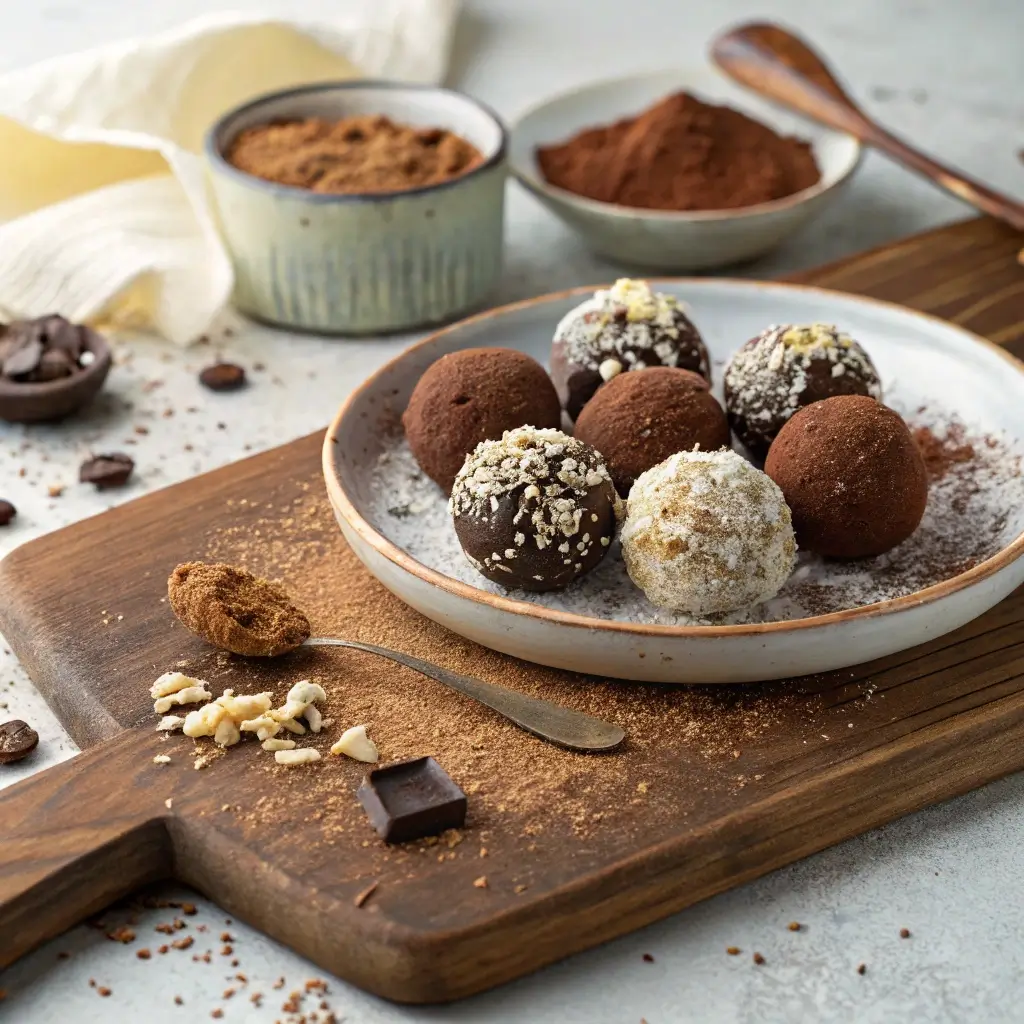
Step 4: Best Coatings for Homemade Chocolate Truffles: Cocoa, Nuts & More
Truffles are traditionally rolled in cocoa powder, but why stop there? Get creative with your coatings!
- Cocoa Powder: Classic and simple, cocoa powder balances the truffles’ sweetness with a slightly bitter touch.
- Chopped Nuts: Finely chopped almonds, hazelnuts, or pistachios add crunch and flavor.
- Shredded Coconut: A sweet, tropical coating for extra texture.
- Melted Chocolate: For a glossy, professional look, dip the truffles in tempered chocolate.
- Sprinkles or Crushed Cookies: Perfect for festive truffles with added crunch.
To coat, simply roll each truffle in your desired topping until evenly covered. Then, place them on a tray to set before serving.
Now that your homemade truffles are complete, it’s time to enjoy them! Whether gifting them or indulging yourself, these rich, chocolatey bites are sure to impress. 🍫✨
Common Problems and Solutions When Making Truffles
Making homemade truffles is a fun and rewarding experience, but sometimes things don’t go as planned. Maybe your ganache is too runny, the chocolate isn’t melting properly, or the truffles are sticking to your hands. Don’t worry! Here are some simple fixes to common truffle-making problems.
Ganache Too Runny or Too Thick? How to Fix It
The consistency of your ganache determines the success of your truffles. If it’s too runny, your truffles won’t hold their shape. If it’s too thick, rolling them becomes difficult. Here’s how to fix both issues.
Ganache Too Runny
If your ganache isn’t firming up after chilling, it could be due to:
✅ Too much cream: Excess liquid makes the ganache too soft.
✅ Room temperature too warm: A warm environment can prevent it from setting.
🔹 How to Fix It:
- Refrigerate for an extra 30–60 minutes to allow more time for it to firm up.
- If it’s still too soft, melt a little more chocolate, let it cool slightly, and mix it into the ganache. Refrigerate again.
Ganache Too Thick
If your ganache is too firm or grainy, it might have too much chocolate or be over-chilled.
🔹 How to Fix It:
- Let it sit at room temperature for 10–15 minutes to soften before rolling.
- If needed, gently warm a few tablespoons of cream and stir it in a little at a time until the consistency loosens.
Chocolate Not Melting Smoothly? Tips for Proper Melting
One of the biggest issues in truffle-making is chocolate that doesn’t melt properly—it can seize, become grainy, or burn.
Why Does Chocolate Seize or Burn?
🔸 Water contamination: Even a drop of water can make melted chocolate seize into a stiff, grainy mess.
🔸 Overheating: Chocolate burns easily if heated too quickly or at high temperatures.
How to Fix Seized or Burnt Chocolate
✅ If Seized (Grainy and Stiff):
- Stir in 1 teaspoon of vegetable oil or warm cream to smooth it out.
- If that doesn’t work, try reheating it gently using a double boiler.
✅ If Burnt (Bitter and Clumpy):
- Unfortunately, burned chocolate can’t be saved. The best option is to start over and use low, gentle heat to prevent scorching.
The Best Way to Melt Chocolate
1️⃣ Use a double boiler: Stirring constantly, stirring constantly, place a heatproof bowl over a pot of simmering water.
2️⃣ Microwave in short bursts: Heat chocolate in 15-second intervals, stirring each time to avoid overheating.
Truffles Sticking to Hands? Best Ways to Shape Them Easily
Rolling truffles can get messy, especially if the ganache is too soft. Sticky hands can make the process frustrating, but here’s how to fix it:
Why Do Truffles Stick?
🔹 Ganache too warm: The heat from your hands can soften the ganache too quickly.
🔹 Overly soft ganache: If it wasn’t chilled long enough, it may not hold its shape.
How to Make Rolling Easier
1✅ Chill Before Rolling – Keep the ganache refrigerated until firm. If it starts melting as you roll, return it to the fridge for 10 minutes.
2✅ Dust Your Hands – Lightly coat your hands with cocoa powder or powdered sugar to prevent sticking.
3✅ Use a Spoon or Melon Baller – Scoop the ganache with a small spoon or melon baller to avoid excessive handling.
4✅ Work Quickly – Roll the truffles in batches, keeping half in the fridge while shaping the rest.
By following these tips, you’ll avoid the most common truffle-making mistakes and create smooth, creamy, and perfectly shaped truffles every time! 🍫✨
Creative Variations of Homemade Truffles
Once you’ve mastered the basics of making chocolate truffles, it’s time to get creative! Why settle for just classic chocolate when you can infuse your truffles with unique flavors, special ingredients, and even a touch of liquor? Whether you’re looking for a boozy twist, a healthier dairy-free option, or an exciting blend of spices, these variations will take your homemade truffles to the next level.
Boozy Truffles: Adding Liquor for a Rich Flavor
Adding a splash of liquor to your truffles enhances flavor and richness for a sophisticated, grown-up twist. Alcohol deepens the taste and adds a smooth, aromatic touch to the chocolate.
Best Liquors to Use in Truffles
🍷 Baileys Irish Cream – Adds a creamy, coffee-like flavor that pairs beautifully with dark chocolate.
🥃 Whiskey or Bourbon – Brings a bold, smoky depth, perfect for chocolate lovers who enjoy a kick.
🍊 Grand Marnier or Cointreau – Infuses truffles with a zesty orange liqueur flavor.
🍒 Cherry Brandy – Complements the richness of chocolate with a fruity, slightly tart edge.
☕ Kahlúa – A coffee-flavored liqueur that enhances the depth of dark chocolate.
How to Add Liquor Without Ruining the Texture
1🔹 Add 1-2 tablespoons of your chosen liquor to the ganache mixture after melting the chocolate.
2🔹 If the ganache becomes too thin, stir in a little extra melted chocolate to thicken it.
3🔹 Allow the flavors to blend by chilling the ganache for at least 4 hours before rolling the truffles.
Boozy truffles are perfect for special occasions, gifts, or an indulgent after-dinner treat!
Vegan and Dairy-Free Truffles: Substitutions for a Healthier Treat
If you’re avoiding dairy or looking for a healthier truffle option, it’s easy to make vegan chocolate truffles with a few simple ingredient swaps.
Key Dairy-Free Substitutions
🥥 Coconut Cream Instead of Heavy Cream – Provides a rich, smooth texture while keeping the truffles dairy-free.
🌱 Vegan Dark Chocolate – Many high-quality dark chocolates (70% cocoa or higher) are naturally vegan.
🥜 Nut Butter for Extra Creaminess – Almond or cashew butter adds a deliciously creamy consistency.
🍁 Maple Syrup or Agave Instead of Honey – For a natural sweetness without using animal products.
Simple Vegan Truffle Recipe
1️⃣ Melt dairy-free dark chocolate with coconut cream over low heat.
2️⃣ Stir in a dash of vanilla extract or almond butter for extra richness.
3️⃣ Chill, roll into balls, and coat with cocoa powder or crushed nuts.
Vegan truffles are just as decadent as traditional ones and are a great option for anyone with dietary restrictions!
Spiced and Infused Truffles: Unique Flavors to Try
Want to experiment with bold, unexpected flavors? Infusing your truffles with spices, herbs, or tea can create complex, unforgettable taste combinations.
Exciting Spices and Infusions
🌶 Cayenne or Chili Powder – Adds a warm, spicy contrast to the sweetness of chocolate.
🫚 Ginger or Cinnamon – Gives a cozy, aromatic depth, perfect for fall or winter treats.
🍵 Matcha Powder – Provides an earthy, slightly bitter contrast that pairs well with white chocolate.
🍂 Earl Grey or Chai Tea – Infusing the cream with tea before mixing it with chocolate creates a subtle, fragrant twist.
🌿 Lavender or Rose Water – Adds floral notes for an elegant, delicate touch.
How to Infuse Flavors into Truffles
1🔹 For tea or spices, heat the cream with the ingredients, then strain out solids before adding chocolate.
2🔹 For spices like chili or cinnamon, mix them directly into the ganache for a bolder kick.
3🔹 For floral extracts like lavender or rose, add just a few drops—too much can be overpowering.
These creative truffle flavors are great for surprising guests, giving as unique gifts, or just treating yourself to something special.
Conclusion: Enjoying and Storing Your Homemade Truffles
Now that you’ve created your homemade chocolate truffles, you’ll want to store them properly to maintain their freshness and flavor. Truffles are delicate, and improper storage can cause them to dry out, melt, or lose their rich taste.
Best Ways to Store Chocolate Truffles
🥶 In the Refrigerator:
- Store truffles in an airtight container for up to two weeks.
- Place parchment paper between layers to prevent sticking.
❄️ In the Freezer:
- Freeze truffles for up to 3 months in a freezer-safe container.
- Thaw in the refrigerator overnight before serving.
🍫 At Room Temperature (Short-Term Storage):
- If storing for just a few days, keep them in a cool, dry place away from heat.
- Avoid direct sunlight or warm environments, as chocolate melts easily.
Perfect for Any Occasion!
Homemade truffles are not just delicious—they make wonderful gifts, are great for parties, and are perfect for indulging whenever you want a sweet treat. Whether you prefer classic, boozy, vegan, or spiced truffles, there’s a flavor for every chocolate lover!
So, what are you waiting for? Get creative, start rolling, and enjoy your homemade chocolate truffles! 🍫✨
You May also be Interested in:
Burrito Bowl: The Guide to a Healthy, Customizable Meal
What is a Breakfast Burrito Made Of? Exploring the Core Components
Are Bananas High in Sugar? Facts and Benefits
How Do I Make the Beef Juicy and Flavorful?
Authentic Carbonara Recipe: Ingredients, Tips & Global Variations