

Why Refrigerator Cookies are the Perfect No-Fuss Treat
If you love homemade cookies but don’t always have time to bake from scratch, refrigerator cookies (also known as slice-and-bake cookies) are your new best friend. This easy-to-make, no-fuss treats allow you to prepare the dough in advance, chill it, and slice off fresh cookies whenever you want.
Why are refrigerator cookies so great? Here are just a few reasons:
✔ Make-Ahead Convenience – Prepare the dough when you can and bake fresh cookies later.
✔ Perfect for Last-Minute Baking – Need cookies fast? Just slice, bake, and enjoy.
✔ Endless Customization – Add chocolate chips, nuts, spices, or even chocolate!
✔ Consistent Shape & Size – The chilled dough ensures even baking and picture-perfect cookies.
Whether you’re prepping for the holidays, making after-school snacks, or stocking up for unexpected guests, refrigerator cookies are the ultimate stress-free dessert. Ready to make your own? Let’s get started!
Recipe: How to Make Perfect Refrigerator (Slice-and-Bake) Cookies from Scratch
Refrigerator cookies follow a simple mix-chill-slice-bake process, making them one of the easiest cookie recipes to master. Below, you’ll find a classic buttery vanilla refrigerator cookie recipe that you can enjoy as-is or customize with your favorite mix-ins.
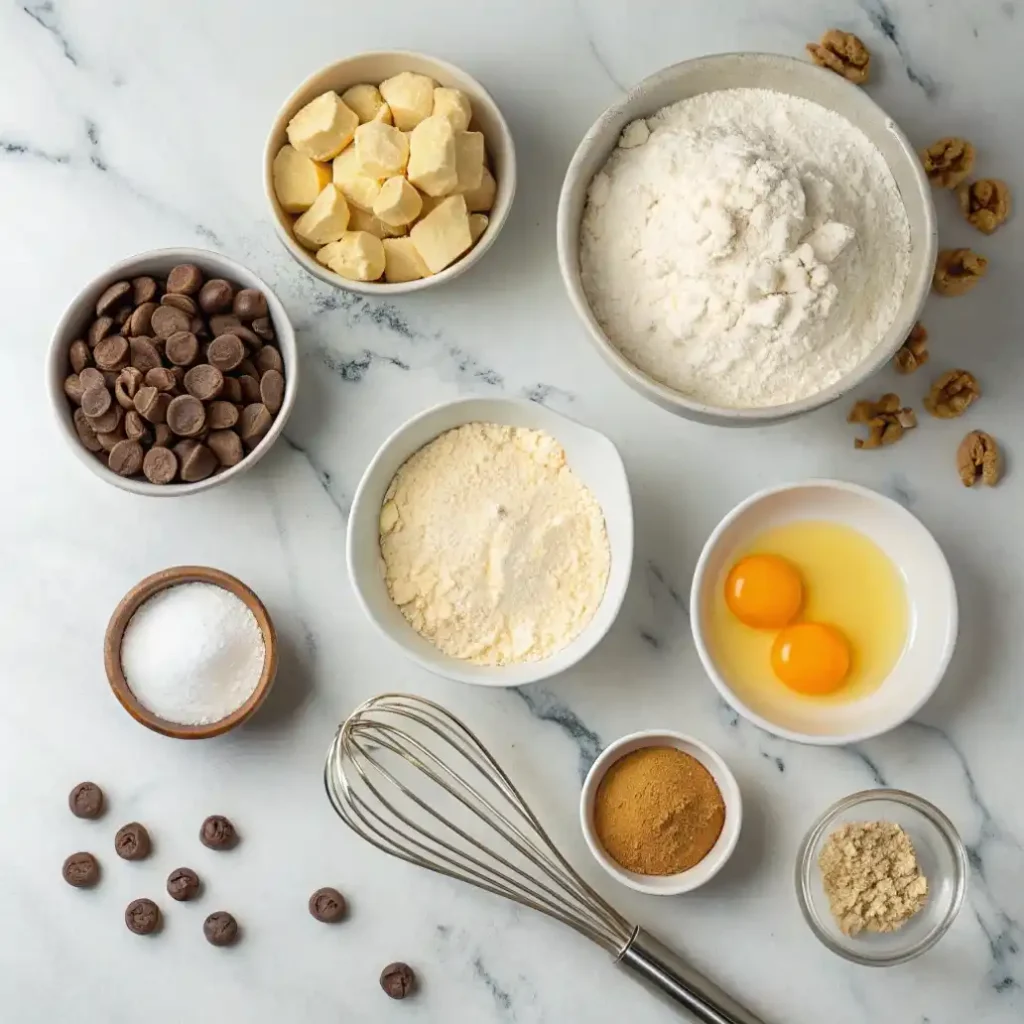
Essential Ingredients and Tools for Refrigerator Cookies
Before we dive into the recipe, let’s make sure you have everything you need:
Ingredients
| Ingredient | Quantity | Purpose |
|---|---|---|
| Unsalted Butter | 1 cup (2 sticks), softened | Provides richness and texture |
| Granulated Sugar | ¾ cup | Adds sweetness and helps with crispness |
| Brown Sugar | ¼ cup | Adds moisture and a slight caramel flavor |
| Egg | 1 large | Binds ingredients together |
| Vanilla Extract | 2 teaspoons | Enhances flavor |
| All-Purpose Flour | 2 ½ cups | Forms the base of the cookie dough |
| Baking Powder | ½ teaspoon | Helps with slight rise and texture |
| Salt | ¼ teaspoon | Balances sweetness |
| Optional Mix-Ins | ½–1 cup | Chocolate chips, nuts, dried fruit, sprinkles, etc. |
Tools You’ll Need
✔ Mixing Bowls – For combining ingredients
✔ Hand Mixer or Stand Mixer – To cream butter and sugar easily
✔ Spatula – For scraping the bowl and mixing thoroughly
✔ Plastic Wrap or Parchment Paper – To roll and chill the dough
✔ Sharp Knife – For slicing the dough into even rounds
✔ Baking Sheet – To bake the cookies
✔ Parchment Paper or Silicone Baking Mat – To prevent sticking
💡 Pro Tip: Chilling is key! Make sure you have space in your refrigerator to let the dough firm up properly before baking.
Step-by-Step Instructions: From Mixing to Baking
Follow these simple steps to create perfectly shaped, delicious refrigerator cookies every time.
Step 1: Cream the Butter and Sugar
In a large mixing bowl, beat softened butter, granulated sugar, and brown sugar together until the mixture is light and fluffy (about 2–3 minutes). This step helps incorporate air into the dough, giving the cookies a nice texture.
Step 2: Add Wet Ingredients
Mix in the egg and vanilla extract, blending until smooth.
Step 3: Combine Dry Ingredients
In a separate bowl, whisk together the flour, baking powder, and salt. Slowly add the dry ingredients to the wet mixture, mixing until just combined.
💡 Pro Tip: Don’t overmix! Overworking the dough can make your cookies tough instead of tender.
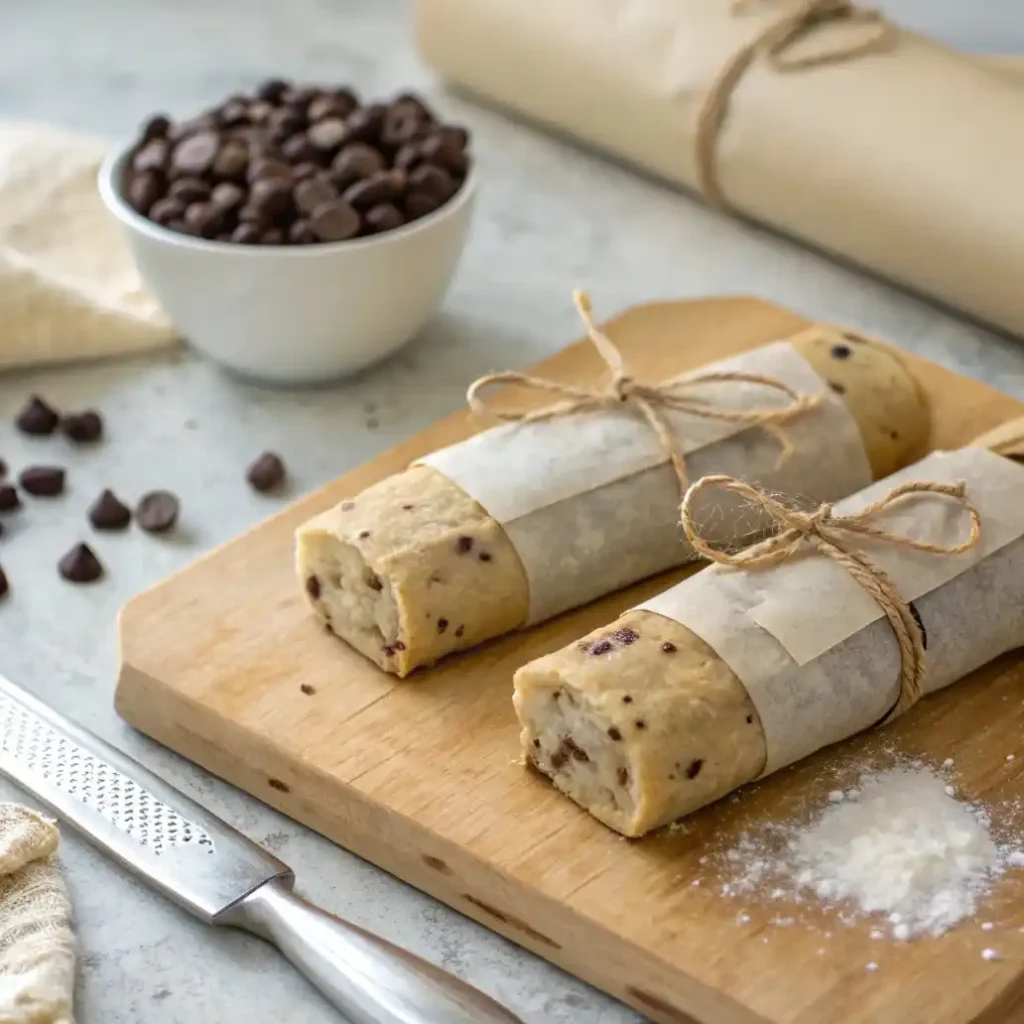
Step 4: Shape the Dough into Logs
Divide the dough in half and roll each portion into a log shape, about 1.5 inches in diameter. Wrap each log tightly in plastic wrap or parchment paper.
Step 5: Chill the Dough
Refrigerate the dough for at least 2 hours (or overnight) until firm. This helps the dough hold its shape when slicing and baking.
💡 Need to bake later? You can store the dough in the fridge for up to 5 days or freeze it for up to 3 months!
Step 6: Slice and Bake
Preheat your oven to 350°F (175°C). Line a baking sheet with parchment paper.
Using a sharp knife, slice the dough into ¼-inch thick rounds and place them 1 inch apart on the baking sheet.
Bake for 10–12 minutes, or until the edges are lightly golden. Let cool on the baking sheet for 5 minutes, then transfer to a wire rack.
Pro Tips for Customizing Your Slice-and-Bake Cookies
Want to make your cookies even more fun? Try these creative customizations!
1. Flavor Boosters 🍪
- Lemon or Orange Zest – Adds a refreshing citrus twist.
- Espresso Powder – Enhances the flavor, especially when paired with chocolate.
- Cinnamon & Nutmeg – Gives a warm, spiced touch.
2. Fun Mix-Ins 🎉
- Mini Chocolate Chips – Classic and delicious!
- Crushed Nuts (Almonds, Pecans, Walnuts) – Adds crunch and depth.
- Dried Cranberries or Cherries – A sweet and tart contrast.
- Rainbow Sprinkles – Perfect for birthday cookies!
3. Finishing Touches ✨
- Drizzle with Melted Chocolate for a fancy upgrade.
- Dip in White or Dark Chocolate and sprinkle with sea salt.
- Roll the Dough Log in Coarse Sugar before slicing for an extra crunch.
💡 Pro Tip: Get creative with flavors—matcha, coconut, peanut butter, and almond extract all work beautifully in refrigerator cookies!
Common Problems and Solutions in Baking Refrigerator Cookies
Even though refrigerator (slice-and-bake) cookies are easy to make, issues can still arise—dough that’s too soft, cookies that bake unevenly, or slices that crumble. Don’t worry! Here, we’ll cover the most common problems and how to fix them so your cookies come out perfectly every time.
Troubleshooting Dough Consistency and Chill Time Issues
Problem: The Dough Is Too Soft or Sticky to Shape
If your dough feels too sticky when rolling it into a log, it might be because:
✔ The butter was too warm when mixing.
✔ The dough wasn’t chilled long enough.
✔ There’s too much sugar or not enough flour.
Solution:
✅ Chill the dough for at least 2 hours (or overnight) to firm it up.
✅ If it’s still sticky, dust your hands with a little flour while shaping the dough.
✅ Avoid overmixing—too much mixing can warm up the dough and make it too soft.
💡 Pro Tip: If you’re in a hurry, pop the dough in the freezer for 30 minutes for a quick chill!
Problem: Dough Is Too Hard to Slice After Chilling
If your cookie dough is rock-hard and crumbles when slicing, it may have:
✔ Chilled for too long in the fridge.
✔ Too much flour, making it extra stiff.
✔ Been stored in the freezer without thawing properly.
Solution:
✅ Let the dough sit at room temperature for 5–10 minutes before slicing.
✅ If it’s still too firm, roll it gently between your hands to soften slightly.
✅ Avoid using excessive flour when making the dough—stick to the exact measurements.
💡 Pro Tip: If you plan to freeze the dough long-term, let it thaw in the fridge overnight before slicing and baking.
Achieving the Right Slice Thickness and Even Baking
Problem: Cookies Are Uneven in Shape or Thickness
If some cookies bake faster than others or look uneven, it could be because:
✔ The dough log wasn’t rolled evenly.
✔ Slices were too thick or too thin.
✔ The knife used was too dull, crushing the dough instead of slicing it cleanly.
Solution:
✅ When shaping the log, roll it evenly so the entire length has the same thickness.
✅ Use a sharp knife to slice through the dough smoothly.
✅ Aim for ¼-inch thick slices—thicker cookies may not bake through properly, while thinner ones can become too crisp.
💡 Pro Tip: If you have a ruler or measuring tape, use it to keep your slices consistent.
Problem: The Cookies Spread Too Much or Don’t Hold Their Shape
If your cookies spread too much in the oven, it could be due to:
✔ Too much butter or sugar in the dough.
✔ The dough being too warm when sliced and baked.
✔ Not enough chilling time, causing the cookies to spread too quickly.
Solution:
✅ Re-chill the sliced dough for 15 minutes before baking to firm it up.
✅ Double-check your ingredient measurements—too much sugar or butter will make them spread more.
✅ If your cookies still spread too much, try adding 1–2 tablespoons of flour to the dough next time.
💡 Pro Tip: Baking on a silicone mat or parchment paper can help prevent excessive spreading.
Preventing Overbaking and Underbaking: Best Practices
Problem: Cookies Are Too Hard or Overbaked
Overbaked cookies lose their chewiness and turn too crispy or dry. This can happen when:
✔ The cookies were left in the oven too long.
✔ The oven temperature was too high.
✔ The cookie slices were too thin.
Solution:
✅ Set a timer for 10 minutes and check the cookies. If the edges are just golden, they’re ready!
✅ Keep your oven at 350°F (175°C) for even baking.
✅ Make sure slices are at least ¼-inch thick to prevent overbaking.
💡 Pro Tip: If your cookies turn out too crispy, store them with a slice of bread in an airtight container—the bread adds moisture and softens them!
Problem: Cookies Are Undercooked or Doughy in the Center
Nobody likes biting into a raw cookie! If your cookies are doughy in the middle, it might be because:
✔ The slices were too thick.
✔ The oven temperature was too low.
✔ The cookies weren’t baked long enough.
Solution:
✅ Keep slices at ¼-inch thickness—anything thicker may need more time.
✅ Make sure your oven is fully preheated to 350°F (175°C).
✅ If the centers seem underdone, leave them on the hot baking sheet for 2–3 minutes after baking to finish cooking.
💡 Pro Tip: Always use an oven thermometer to make sure your oven is running at the right temperature!
Final Thoughts: Perfecting Refrigerator Cookies Every Time
Baking refrigerator cookies is easy and fun, but little mistakes can affect the results. You’ll get perfectly shaped, delicious cookies every time by chilling your dough properly, slicing evenly, and keeping an eye on baking times!
✔ Struggling with sticky dough? Chill it longer, or dust your hands with flour.
✔ Dough too hard? Let it warm up slightly before slicing.
✔ Cookies spreading too much? Chill before baking, and check your butter ratio.
✔ Overbaking or underbaking? Adjust your time, thickness, and temperature.
Master these tips, and you’ll always have stress-free, make-ahead cookies ready for any occasion. Happy baking! 🍪✨
Creative Variations and Serving Suggestions for Refrigerator Cookies
One of the best things about refrigerator cookies is how versatile they are. Whether you prefer classic buttery slices or want to experiment with bold flavors, there are endless ways to customize your cookies. Here, we’ll explore delicious mix-in ideas, creative flavor twists, and fun ways to serve and present your cookies for any occasion.
Flavor Enhancements and Mix-In Ideas
Want to take your slice-and-bake cookies to the next level? Try adding different flavors and mix-ins to create unique, mouthwatering variations.
Classic Flavor Additions
These simple tweaks will enhance the flavor of your cookies without changing their texture:
✔ Vanilla Bean – Scrape the seeds from a vanilla bean pod for a richer, more aromatic taste.
✔ Citrus Zest – Lemon, orange, or lime zest adds a bright, fresh flavor.
✔ Espresso Powder – A teaspoon of espresso powder brings out a deep, rich flavor, perfect for pairing with chocolate.
✔ Almond or Coconut Extract – A drop enhances the taste without overpowering the dough.
💡 Pro Tip: For a fun twist, swap vanilla extract for maple or rum extract for a slightly different flavor profile!
Tasty Mix-In Ideas for Extra Texture
If you love a bit of crunch, chewiness, or bursts of flavor in every bite, try these mix-in combinations:
| Mix-In | Best Pairings | Flavor Profile |
|---|---|---|
| Dark Chocolate Chips | Orange Zest, Espresso Powder | Rich, slightly bitter, and indulgent |
| Chopped Nuts (Almonds, Pecans, Walnuts) | Cinnamon, Maple Extract | Crunchy, nutty, and slightly sweet |
| Dried Cranberries or Cherries | White Chocolate, Orange Zest | Tart, chewy, and slightly tangy |
| Shredded Coconut | Dark Chocolate, Almond Extract | Tropical, sweet, and nutty |
| Crushed Peppermint Candy | Cocoa Powder, Vanilla | Cool, minty, and refreshing |
💡 Pro Tip: To avoid overloading the dough, stick to ½ to ¾ cup of mix-ins per batch!
Presentation Tips and Pairing Suggestions for Any Occasion
Refrigerator cookies aren’t just delicious—they can also be beautifully presented! Whether you’re serving them at a party, giving them as gifts, or enjoying them with your favorite drink, here are some fun ways to elevate your cookie experience.
Decorating Your Cookies Like a Pro
Even simple slice-and-bake cookies can look gourmet with these easy decorating techniques:
✔ Drizzle with Chocolate – Melted dark or white chocolate adds an elegant touch.
✔ Roll the Edges in Sugar or Sprinkles – Before baking, roll the dough log in colored sugar or finely chopped nuts for a decorative crust.
✔ Dip in Glaze – A quick dip in vanilla or lemon glaze gives a bakery-style finish.
✔ Use Cookie Stamps – Before baking, press a decorative cookie stamp on each slice for a unique, professional look.
💡 Pro Tip: For festive cookies, roll the edges in crushed peppermint, cinnamon sugar, or colored sprinkles!
Perfect Drink Pairings for Refrigerator Cookies
Cookies and drinks go hand in hand—here’s what to serve with your homemade cookies:
| Cookie Flavor | Best Drink Pairing | Why It Works |
|---|---|---|
| Classic Butter Cookies | Hot Tea with Honey | Light, buttery cookies complement delicate tea flavors |
| Chocolate Chip Slice-and-Bake | Cold Milk | The ultimate classic pairing—milk balances the sweetness |
| Citrus Shortbread | Iced Lemonade | Bright, citrusy cookies enhance the fresh flavors of lemonade |
| Nutty or Spiced Cookies | Hot Coffee or Chai Tea | Warm, spiced flavors pair beautifully with bold, rich drinks |
| Peppermint Chocolate Cookies | Hot Cocoa | A winter favorite—the minty crunch goes perfectly with chocolate! |
💡 Pro Tip: Hosting a party? Serve an assortment of cookies with a DIY beverage station featuring different teas, coffee, and milk options!
Gifting and Storing Refrigerator Cookies
Homemade cookies make wonderful gifts! Here’s how to make your cookies look and taste fresh for longer:
1✔ Wrap in Parchment Paper and Twine – Tie the dough log in parchment and a ribbon for a cute, homemade gift.
2✔ Store in an Airtight Container – Keep cookies fresh by storing them in an airtight container at room temperature for up to 5 days.
3✔ Freeze for Later – Slice and freeze the dough for up to 3 months—just bake straight from the freezer when needed!
💡 Pro Tip: Add a handwritten tag with baking instructions when gifting unbaked cookie dough!
Conclusion: Mastering Refrigerator Cookies for Effortless Baking Success
Refrigerator cookies are the ultimate stress-free treat—you can make the dough ahead of time, slice as needed, and bake fresh cookies on demand!
1✔ Love variety? Experiment with different flavors, mix-ins, and decorations.
2✔ Want perfect cookies every time? Follow the chilling, slicing, and baking tips we shared.
3✔ Need an easy dessert for guests? Keep a batch of cookie dough in the freezer for a quick, homemade treat anytime!
With these tips, tricks, and creative ideas, you’ll always have delicious, bakery-quality cookies ready to impress. Happy baking! 🍪✨
💡 Looking for more cookie recipes? Check out The Ultimate Guide to Bar Cookies for even more sweet inspiration!
Looking for more indulgent cooking ideas? Check out:
The Simple Guide to Drop Cookies: Classic Recipes, Tips, and Troubleshooting